There’s some debate about whether it’s better to install roof windows from inside the loft or from outside. Whilst the job can sometimes largely be done from inside, the preliminary stage of removing slates or tiles is normally better carried out externally. This is because it’s very difficult to loosen and remove traditional slates or plain tiles from inside without causing some to cascade dangerously down to the ground. However, where roofs are clad with large interlocking tiles (such as the modern concrete side – interlocking type ) removing them from inside should be a lot easier, but you’ll still need to cordon off the danger area down below as a precaution. Being only single lapped, rather than double lapped for plain tiles and slates makes them easier to lift. Natural slate coverings are probably the most difficult since slates are nailed in place.
To work successfully from inside the loft, you’ll need a stable platform, such as a good pair of step ladders, that allows you to stand up comfortably through the opening in the roof, to about elbow height (much higher and there can be a risk of falling).
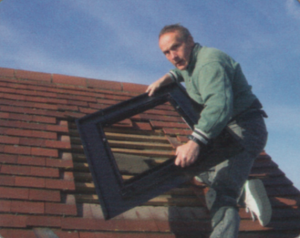
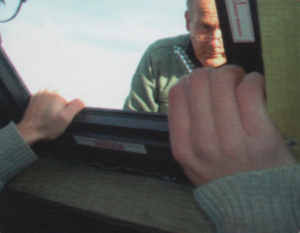
The job of fitting roof windows it is undertaken by roofers or carpenters. Quite naturally, the former tend to favour the outdoor approach, shown in the example below. If external access is good, with scaffolding or a decent scaffold tower to work from, and for most bungalow loft conversions, the outdoor option should achieve swifter results. Either way, the tasks undertaken are essentially the same.
One of the first and most important decisions to make is, of course, whether any rafters should be cut. If possible this should be avoided as it weakens the roof structure. There are many standard roof windows (eg 550mm wide) that will fit easily between modern rafters, spaced at 600mm centres.
With older houses where the rafters are more closely spaced (eg at 400mm centres), special conservation windows designed for period properties with limited space may be suitable . Fitting two smaller windows side by side (or one above the other) is often preferable to one larger window, as it can avoid the need for structural cutting to rafters. Also, a combination of smaller windows tends to look better architecturally from outside than one clunking great rooflight.
Where cutting rafters is inevitable, the timber framework around the window – ie the rafters either side and the top and bottom trimmers – must be double-up.
The higher up the roof you fit the windows, the more light should flood in. At the design stage you need to picture the finished room and consider your desired view. From a practical perspective you normally wouldn’t fit windows any higher than about six courses of plain tiles or slates below the ridge. Any higher and the works can cause the ridge tiles to become loose and need re-beddin.
It’s not unknown for other builders to wrongly install roof windows. Inept weatherproofing at the flashings can sometimes cause leaks, and in some cases windows have even been fitted upside down!🤦🏻♂️ Different manufacturers’ windows have varying installation requirements, explained in the instructions with each product, but the following should be a useful general guide.
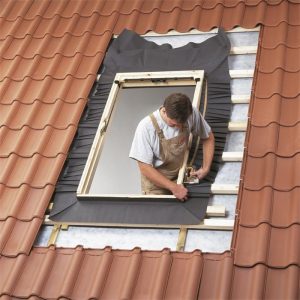
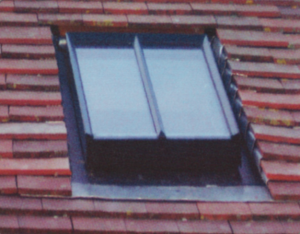
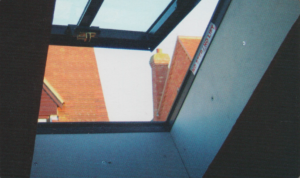
The roof window featured here is an externally fitted Replica 1 model from “The Rooflight Company”, with a structural width and length of 550 x 700mm. Finally, before cutting large holes in your roof don’t forget to schedule some decent weather!☀️☀️☀️
Personal safety
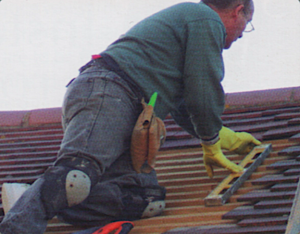
For any work carried out at height, please refer to the Working at Height Regulations and wear a safety harness. Note that if you need to cut tiles or slates using a tile cutting disc or angle grinder, always wear goggles and gloves .
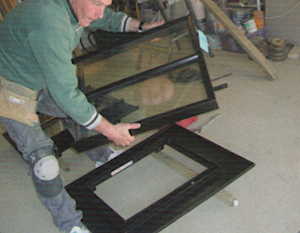
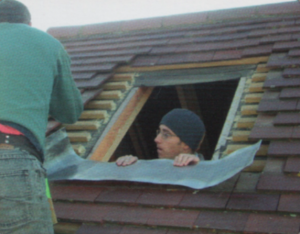
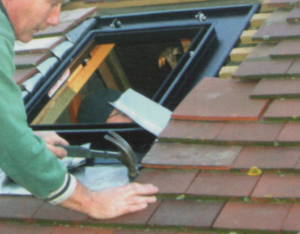
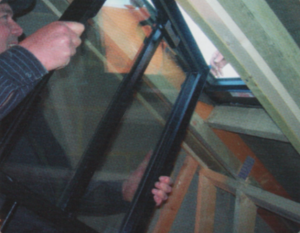
1. First, temporarily remove the opening part of the window, the glazed casement, from its ‘base- plate’ or sub-frame by unscrewing the hinge bolts or pins. Take care not O scratch the protective coating to the paintwork, and set the casement safely aside. Measure the dimensions of the base-plate. Mark the approximate position of the window on the rafters.
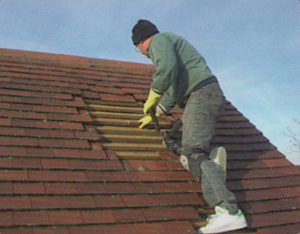
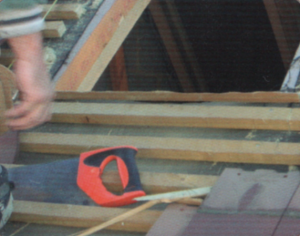
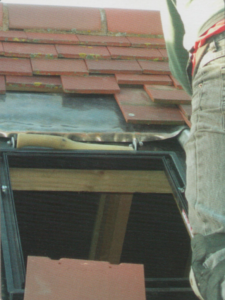
2. Working from the outside, carefully lift and remove some tiles or slates. Expose an area roughly equivalent of the base-plate plus an additional two or three rows and courses beyond, around the frame. Unlike traditional slates, most tiles aren’t nailed in place and can simply be lifted off, making them easier to work with. To remove interlocking tiles from inside the loft, first cut and remove an area of underfelt exposing the battens and the underside of the tiles. Then gently lift the nibs of each tile and carefully slide them back between the battens.
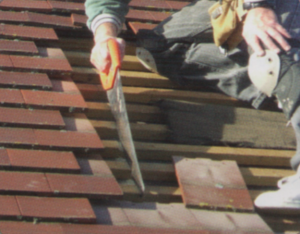
3. In this example, the window base-plate is designed to sit across a pair of rafters once the battens have been cut and removed. Having marked the outline of the base-plate on the battens, they can be carefully sawn and the opening for the base-plate made. In this example the battens are cut to almost meet the sides of the base plate, but with a 5mm expansion gap. Where any batten ends are left unsupported, timber packing strips can be nailed along the sides of the rafters below, Note that different manufacturers’ roof windows vary in this respect. Some are designed to sit on top of battens around the opening secured with external brackets.
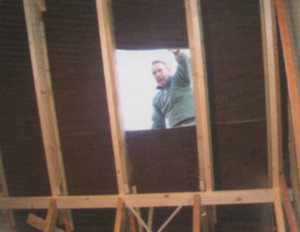
4. Working from the outside, the underfelt (or in some roofs, timber sarking boards) can now be cut away to approximately the size of the window base. If working internally this will have been done at step 2.
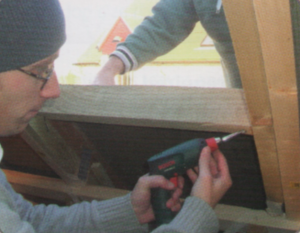
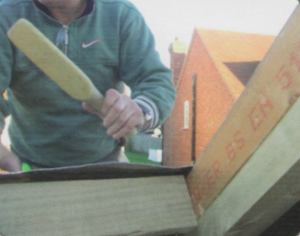
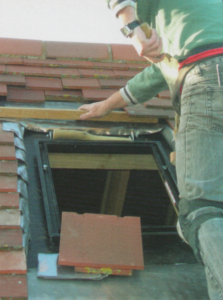
5. To complete the timber D framework which will support the window, timber trimmers must be fitted to the top and bottom of the opening, between the rafters either side. Normally 100 x 50mm sawn treated timber can be used, or a similar size to match the rafters. First, mark the base-plate’s top and bottom position on the rafters, using a 90° set square. Then skew-nail or screw the trimmers securely in place.
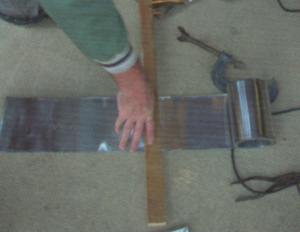
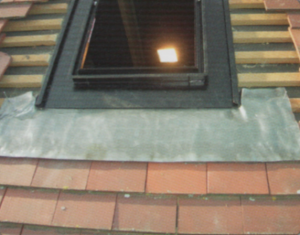
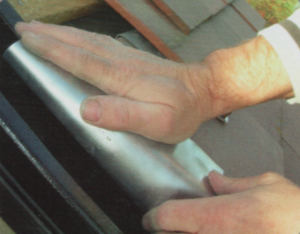
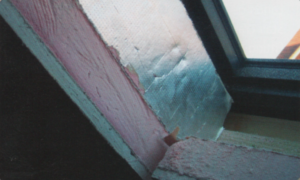
6. Cut a strip of 300mm wide lead O sheet. This will be used to form an apron below the window at the sill, extending 150mm either side of the base-plate. (Step 8).
7. To smooth the path of the lead sheet, a small triangular ’tilting fillet’ (sawn treated timber) should be placed along the top of the first row of tiles, below the opening. Then lay a thick line of silicone roof sealant along the surface of the lead apron. This will ensure water-tightness to the joint when the base-plate is fitted.
8. Dress the lead sheet down so that it laps generously over the tiles below. At its top, the lead sheet should cover the bottom trimmer of the frame.
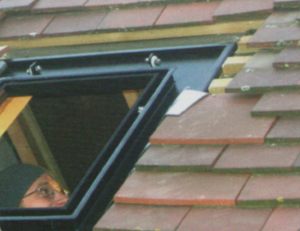
9. Carefully position the base-plate so that it sits in the prepared framework. Check that it’s level and square. Small adjustments can be made by adding thin strips of timber ‘shims’ as necessary.
10. The base-plate has a pair of fixing brackets either side which are securely bolted into the rafters with coach bolts, once any small gaps have been filled with timber packing.
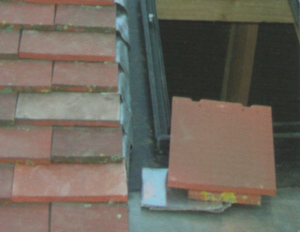
11. The sides of the window are made watertight with lead soakers tucked under each course of tiles. These are small oblong strips of lead cut from the 150mm-wide roll of lead flashing. The size depends on the size of tiles or slates (being roughly three-quarters the length of the tile). For the traditional 265 x 165mm plain tiles shown, strips about 200mm long should be adequate.
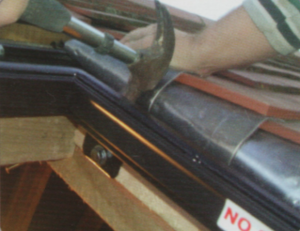
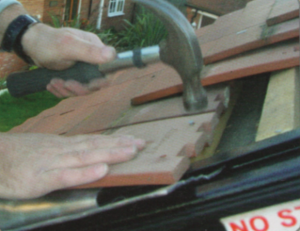
12. Starting at the bottom of each side, fold each oblong strip of lead so that it tucks down into the side of the base-plate. Then hang a tile onto the batten and nail it in place (using non-corrosive roofing nails). Bend the lead over the top of the tile and dress it at least halfway across the tile. This is then covered and secured by the next tile to the course above. Continue until each course of tiles covers a lead soaker.
13. To achieve an even edge to the tiles on each side of the window, extra-wide ‘one-and-a-half tiles are used on every alternate course (the same type used at roof verges). By spacing out all the tiles in a row slightly wider than normal, any gaps can be accommodated.
14. To make the top of the base-plate watertight, a head flashing is fitted. This is formed similarly to the lead apron at the sill by cutting a strip of 300mm-wide lead, extending 150mm either side of the base-plate. The lead sheet is dressed over the battens above, and tucked under the roofing felt below the topmost batten. The lower edge of the lead sheet is lapped over the top of the base-plate, and dressed down into it. As shown earlier, a small triangular timber tilting fillet is first placed along the outer edge of the base-plate to help smooth the path of the lead sheet.

15. The top of the window is finished by replacing rows of tiles nailed to the battens. The lowest course of tiles should be shorter eaves tiles. These cover the head flashing.
16. The glazed window casement can now be reattached to the TO base-plate by connecting it through the hinge posts using the original bolts and washers.
17. To the inside, the window reveals are lined with strips of insulation. Because the bracket for the window handle or winder will need to be firmly screwed in place, a strip of timber must be fixed to the centre of the lower reveal before insulating.
18. Finally, plasterboard strips can be cut to cover the window reveals to the sides, top and bottom. These should slot neatly into the ready-made groove in the window frame.
Other makes and models
Like cars, roof windows come in all kinds of different qualities and styles. The roof window shown here is an all-steel type that’s designed to sit discreetly, relatively low within the roof slopes. Some other roof windows have a timber frame instead of a base-plate, which is fixed to the rafters with metal brackets so they sit on top of the battens. Special flashing kits suitable for different types of tile or slate roofs are sometimes supplied. Before fitting, always refer to manufacturers’ instructions for the specific type of roof window.