Kitchen refurbishment expertise. Every step of the way.
From cutting edge contemporary styles to traditional period designs, we can provide a
competitive planning, design and project management for every kitchen refurbishment project within London and country side (subject to availability) to deliver your family dream kitchen.
Kitchens, like bathrooms are the “hot” side for any home refurbishment project and
modernising it is a great way to add extra value and practicability to your property as long as it is well
proportionate to the overall value of your home. By implementing a few upgrades, most
kitchen installation projects can end up paying big dividends when the time
comes to sell.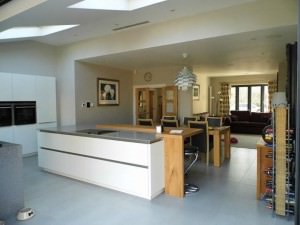
The kitchen is the most used room in the home. Most people want it to be a comfortable space. If you’re thinking about a kitchen installation and are on a budget, you should consider exactly what you want to upgrade to your kitchen.
What is it going to be?
- Is it big and comfortable enough for you to have meals with your family, or long conversations with friends, or is it just a place where you cook?
- It’s important to design a kitchen that revolves around your needs as it is often seen as the ‘hub of the house’.
The layout you choose will depend on the size and shape of your room – and the position of windows and doors. Pipework, drainage system and electrical points can certainly be moved, so do not let these restrict your design. Most fitted kitchens fall into four key design layouts:
- A single line of units
- A double line (galley)
- An L-shaped
- Or U-shaped kitchen with island.
By combining cabinets imaginatively to these design layouts it is easy to totally transform your kitchen to suit your lifestyle.
So if you want or you are in the need to upgrade your kitchen, give it a complete revamp or you are looking for
something more bespoke, our kitchen fitters and design partners can offer free advice
on how to make the most out of your kitchen and how to get the best value from it.
From contemporary kitchens to the traditional wood, country feel, we can help you make
the right decision for your home. Our kitchen installation team will install any make
of units, appliances, flooring, or tiling you desire to make sure your kitchen exceeds your
expectations.
Our kitchen fitters and expert craftsmen have a wealth of experience installing
kitchens from a wide variety of suppliers, which includes:
|
|
|
|
|
|
|
|
|
|
|
|
|
|
|
|
|
|
|
|
What Does a Kitchen Refurbishment Include?
- New kitchen units
- New worktops
- 3 rows of single colour wall tiles (situated above the worktop only)
- New floor covering, including cement screed base
- Decoration of walls, ceiling and woodwork
- Installation of a new fire door to the kitchen (where required)
- A new sink and taps
- Electrical rewiring and a new fuse board
- Installation of smoke and heat detectors (a requirement to meet fire regulations)
- Plastering where required
- Installation of extractor fan (where required)
- Asbestos removal (where required)The works take around 15 working days to complete and we will go into detail down on this page to know what you can expect to happen at each stage before and during the installation.
Stage One: Design, Plan & Asbestos Survey
Your new kitchen starts with a feasibility survey. Our surveyor will visits your home at your convenient time too:
- Take all the necessary measurements and discuss the options you have, from where you can get the new kitchen;
- Let you choose the colours wall and floor tiles;
- Discuss the number of electrical outlets, position of the appliances;
As you will get the kitchen units and the worktop, it is most likely that you can get the appliances from the same place. It is very important that you tell the kitchen designer if you are thinking of buying any new appliances as they will need to be included within the new plan. This is especially important if the new appliances are a different size or shape to the ones you already have.
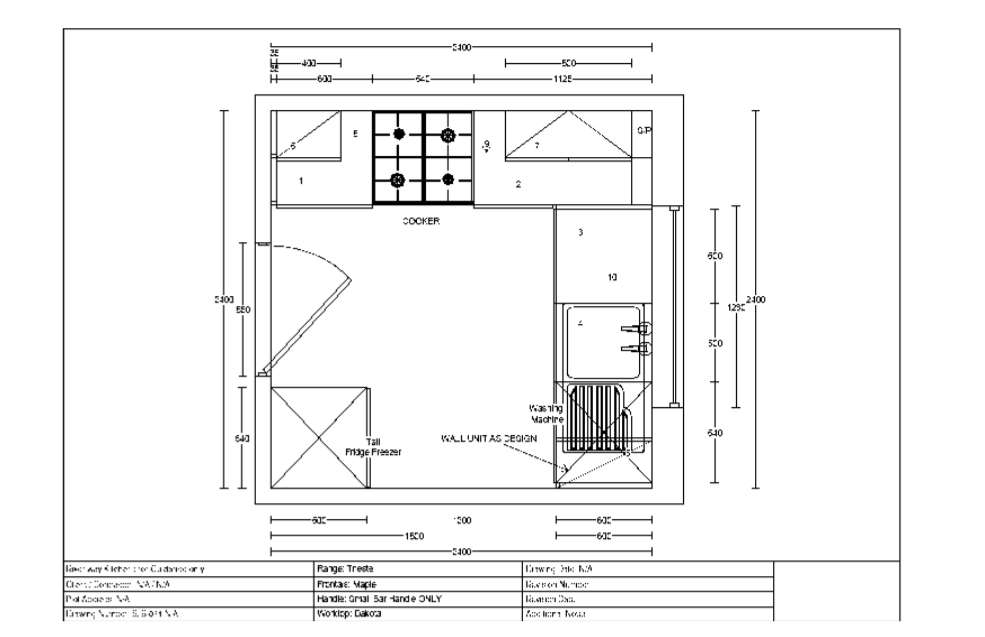
The kitchen designer will leave you a plan, like the one below, to show the layout of your new kitchen. Please ensure you keep this to hand as we need to follow this drawing as a guide, though we will ask you to send us a copy too.
Once the kitchen designer will provide you with the final drawings and the cost of the units, worktop and appliance (or depending on your case), our surveyor will send you the final quotation based on it’s original survey. If you agree the costs for the kitchen refurbishment, we will then arrange a visit, to complete the following:
- An asbestos survey around your home;
- An electrical test to your home*;
- A survey of your current boiler*;
Samples of materials may be taken and tested for asbestos. If asbestos is found in the area we are working in we will have it removed safely by an approved contractor.
*additional costs may occur if a repair/replacement is required
Pre-start – What Happens?
Below is a checklist of what we need before we can start refurbish the kitchen:
- Your feasibility survey completed, quotation, costs agreed and signed by you or your representative;
- The choices you made for your new kitchen;
- The asbestos survey completed;
- The electrical test (Periodic Inspection Report) carried out.
Once the technical surveys and tests have been completed, a our representative will introduce the team designated to carry out the works and discuss the process with you to ensure that you’re aware of the type of works involved and length of time it can take to complete. If you have any questions about the project, now is the best time to ask them.
Stage Two: During the Installation – On-site Preparation
Once your new kitchen has been manufactured and details of the delivery are set, the installation team will arrive on your arranged start date. They will start the on-site preparation as follows:
Day 1 and 2
- If the survey conducted before work starts finds asbestos, it will be removed by an approved contractor within controlled conditions. Asbestos will contained and removed safely from the property straight away;
- Your existing kitchen units will be removed;
- The installation team will leave you with a working sink unit and cooking facilities each day (it may not always apply, depends from case to case);
- First stage of electrical rewiring will be started;
- If you’re receiving a new boiler, the installation is likely to start on day 2, please note that this will extend the time spent installing your kitchen by around 2 days as the gas engineers and kitchen installation team will not be working always at the same time;
- If there is no asbestos identified and you aren’t having a boiler replacement, the installation team may not be working in your home on day 2.
Important note: This is a messy and noisy part of the process so please ensure that all residents, especially small children, and pets, stay out of the working area and keep doors closed where possible.
Stage three: During the Installation – On-site Prep/Installation
The installation team will continue works on Days 3, 4 and 5, works will include:
Days 3, 4 and 5:
- Electrical rewiring;
- Plumbing works;
- Plastering where required, this could include ceiling and walls.
The plaster will take around two days to dry, if the weather is good please leave a window open, or the installation team may use a de-humidifier in the winter months to help the area dry.
Stage four: During the Installation – Installation Continues
The installation team will continue works on Days 6, 7, 8, 9 and 10, works will include:
Day 6, 7, 8, 9 and 10:
- Installation of new kitchen units;
- Installation of smoke detectors (hall and landing) and heat detectors in the kitchen;
- Wall tiling;
Stage Five: During the Installation – Finishes
The installation team will continue works on Days 11, 12, 13 and 14, works will include:
Day 11-14:
- Finish off wall tiling
- Floor screeding (the cement base under the floor tiles);
- Decoration of walls and ceiling;
- Boxing in of exposed pipework (not boilers, make sure you ask to get a cupboard when the kitchen designer comes in);
- Floor finishes.
Stage Six: Kitchen Completion – Handover & Customer Satisfaction Checks
Day 15:
1. Cleaning and inspections for snagging
Your new kitchen is now complete!
Stage Seven: After the Works
- If any minor corrections are identified, the installation team is given five working days to complete them.
- Once the works are fully completed, a project manager may visit to carry out a final inspection. Please note, we currently check a percentage of works and will not inspect all properties due to the current large demand.
- A satisfaction survey will be sent to you to complete, to gather feedback on your new kitchen.
- Your new kitchen has a defects period (or guarantee) of one year, if you experience any problems with your kitchen within this time please contact us on 07453511694.
Useful hints and tips
Please read through our useful hints and tips for you to help us make the installation run as smoothly as possible:
- Ensure the kitchen is cleared as much as possible before your start date and remove any breakables from the kitchen and hallway. The installation team will need to bring materials in and out of the property so walkways must be kept clear.
- If you need to pop out or make alternative access arrangements with the installation team, please let them know in good time. This will help avoid missed appointments or access problems which could delay the installation of your new kitchen.
- Keep all children and pets away from the work area, there will be tools in the kitchen and disruptive works taking place, your family’s safety is our top priority!
- Keep internal doors closed downstairs, the works will be dusty at times. We will try to keep the area as clean as possible but would request that doors are closed to prevent dust from blowing around.
- If you have any questions regarding the kitchen project itself please contact us as soon as possible. We would like to resolve any queries before the works are taking place.
Aftercare Tips – How to Look After Your New Kitchen
These helpful hints will assist you to keep your kitchen looking smart and in top condition.
All worktops, doors and laminated surfaces
Streaks
Streaky marks sometimes show on dark colours after cleaning.
Try using a micro-fibre or lens cleaner cloth to reduce streaky marks.
Grease
Warm, soapy water is the best way to deal with greasy marks. Dab, wait and wipe away.
Spills
Surfaces will resist staining from most household chemicals. However, ensure you wipe the following liquids away quickly to avoid staining and dull patches:
- Grape juice, wines and other berry juices
- Antiseptic solutions and other first aid preparations
- Concentrated bleach
- Oven cleaners
- Dishwasher detergents
- Artificial dyes including food and hair colouring
Scratches
Laminated surfaces will withstand normal wear and tear, but can be damaged by scratching or cutting with utensils such as knives. Darker colours will show scratches more readily than lighter colours. This is an inherent feature of the product, not a fault. Use a chopping board when preparing food to avoid scratching worktops.
Moisture
Water won’t harm the surfaces, but it may affect the adhesive and core materials underneath if it is excessive. Therefore, remove any excess moisture to stop it seeping into joints or running down cupboard doors.
Hot Objects, Steam and Condensation
Don’t place hot pots, pans or dishes directly on to the worktop, use a chopping board or trivet instead.
If you have a dishwasher or oven underneath the worktop try to ensure it has cooled before opening the doors. The steam can settle as moisture underneath the work surface and this can cause damage to the kitchen over time. If steam escapes then wipe any moisture on the worktop immediately with a cloth.
Cleaning Products:
Do not use scourers or other abrasives, glass cleaners, polish or waxes to clean your kitchen as these are likely to cause damage to the worktops and edgings. When choosing cleaning materials check the labels to make sure they don’t contain:
- Thinners
- Acetone
- Bleach
- Turpentine
- Ammonia
Check with the manufacturer of cleaning agents before using on any surfaces.
Wall and base units
The cleaning and care of these items is the same as for all surfaces, see above. Additional care needs to be taken to ensure that water or condensation, if present, is not allowed to stand. This will result in damage to the panels, which would not be covered under your guarantee.
Don’t operate electrical appliances such as a kettle or toaster underneath wall cupboards. Move the appliance forward to allow the steam to escape.
Unit Door & Drawer Fronts
Coffee and tea stains if allowed to dry will slightly discolour the laminate. Make sure you wipe it immediately.
Don’t use pressure washers or thermal cleaning equipment on your furniture fronts. Excessive heat will adversely affect the surface structure of the furniture fronts.
Don’t use wood care products or polishes on your kitchen surfaces. These products may cause bulging within the surface or delamination (detachment of the edges).
Kitchen Flooring
We recommend that barrier mats are installed at door entry points to your home. This will limit the amount of wet and dry soiling and make the floor easier to clean and maintain.
Allow at least 5 days from completion of the installation before carrying out any wet cleaning of the floor.
Clean the floor area with a soft broom.
Mop clean with a diluted non-acidic cleaning product; try to use products with a pH of 7 or above, the labels of your cleaning product should offer information on its pH level.
Taps
Sink taps are really easy to care for, simply wipe them over with washing up liquid on a cloth or sponge, rinse well and dry off with a soft clean cloth. (If the cloth has previously been used with bleach ensure you rinse it well before wiping the taps)
Don’t use any cream cleaners or solutions with a bleach content as they affect the finish of the taps and will not be covered by the guarantee. Also, avoid using abrasive cloths or wire cleaners to avoid scratching the tap surface.