REINFORCING A CORNER
Plastered corners are vulnerable, particularly in corridors, and often need reinforcing.
Corner beading reinforcement
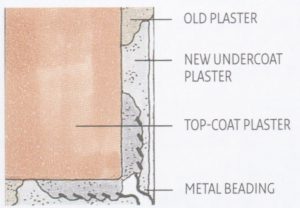
If damage to a corner extends along most of the edge, we usually reinforce the repair with a metal or plastic corner beading. As well as strengthening the new corner, it will speed up the repair work considerably, because it dispenses with the need to use a board as a guide. We obtain beading from any good builders’ merchant such as BuilderDepot or Wickes. We cut it to length with snips and a hacksaw. Metal beading has a protective galvanized coating, and the cut ends must be sealed with a metal primer or bituminous paint. We cut back the damaged plaster, wet the brickwork, and apply patches of undercoat plaster each side of the corner. We then press the wings of the beading into the plaster patches (1), using our straightedge to align its outer nose with both of the original plaster surfaces. We allow the plaster to set after which we build up the undercoat plaster, but scrape it back with your trowel to 2mm (1/16 inches) below the old finished level (2). We apply the finish coat, using the beading as a level to achieve flush surfaces and we take care not to damage the beading’s galvanized coating with the trowel – or rust may come through later and stain wall coverings.
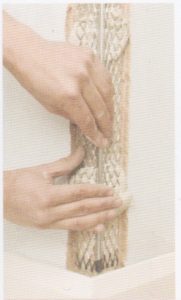
1 Press into plaster
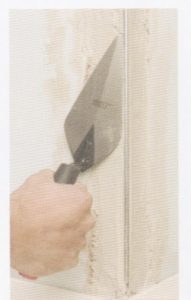
2 Trim undercoat back
HOW WE PLASTER OVER A FIREPLACE OPENING
Jobs of this kind can be undertaken with one-coat plaster, or an undercoat plaster followed by a top coat of finish plaster, as we will explain below.
How we do one-coat plaster
We prepare the background by cutting away any loose plaster above and around the brickwork. We dampen the background with clean water and and before we start, we place a strip of hardboard against the foot of the wall to catch dropped plaster, tip the plaster onto a spot board, then scoop some onto a hawk and, with a trowel (or the spreader provided), we just apply the plaster to the brickwork. The best way to work is in the sequence, as shown on the right, starting at the bottom of each section and spreading the plaster vertically. Working each area in turn, blending the edges, then level
the plaster with a rule. Fill any hollows, and level again. We leave the plaster to stiffen for about 45 minutes by which time firm finger pressure should leave no impression. At this stage, we can lightly dampen the surface with a close-textured plastic sponge, and then use a wet trowel or spreader to smooth the plaster to a ‘polished’ finish. Using firm pressure, sweeping the trowel from side to side and then up and down until you have the perfect surface. The trowel must be kept wet all this time. The plaster now can be left to dry thoroughly, after which the surfaces can be decorated.
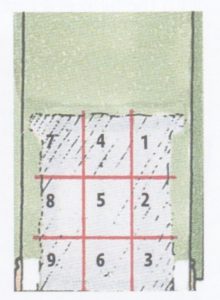
Plastering sequence
The area must be divided in manageable portions to apply the plaster in the sequence shown.
How we two-coat plaster
We apply undercoat and finish-coat plasters as we described above but for the second coat we scrape back the undercoat to allow for the thickness of the finishing coat.
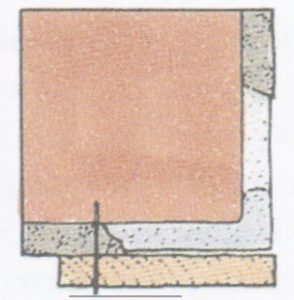
HOW WE REPAIR A CHIPPED CORNER
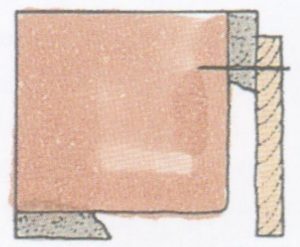
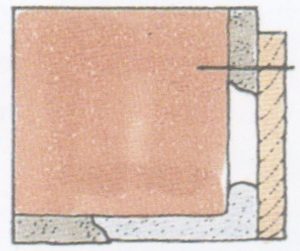
When the plaster covering an external corner breaks away, it usually reveals unsightly patches of masonry. We repair the damaged area with one-coat or two-coat plaster, using a wide board nailed on one side as guide to help you achieve a neat corner. With a bolster chisel, we cut away the plaster near the damaged edge to reveal about 75mm (3 inches) of masonry on each side of the corner. When we are using two-coat plaster, we nail the guide board on one side of the corner, so that the board’s edge is set back about 3mm (1/8 inches) from the surface of the plaster on the other side of the corner (1). We mix up the undercoat plaster, wet the brickwork and the broken edge of the old plaster, then we fill one side of the corner up the edge of the board but not flush with the wall (2). Scratch-key the new plaster with your trowel. When the plaster has become stiff, remove the board, pulling it straight from the wall to prevent the plaster breaking away. The edge thus exposed represents
the finished surface – so, to allow for the top coat, we scrape the plaster back about 3mm (1/8 inches), using the trowel and a straightedge as a guide (3). For the next stage, we simply hold the guide board over the new repair and fill the second side of the corner with plaster. An easier method is to let the new plaster harden, then nail the board in place before applying and keying fresh plaster as before (4). After the undercoat is set, we nail the board to the wall as before, but this time aligning its edge with the original plastered surface, and fill level with finish plaster. When necessary, we dampen the under-coat to reduce the suction. When both sides are firm, we polish the new plaster with a wet trowel, rounding over the edge slightly, and leave the plaster to dry out. When we are using the one-coat plaster for the repair work, we set the guide board flush with the finished surface on each side of the corner.
1 Set board back
2 Fill flush with board
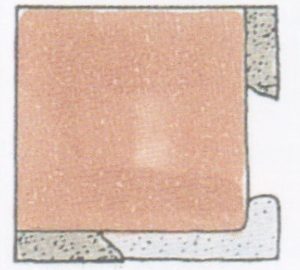
3 Scrape back edge